Create Controller in Laravel 8 using Artisan Command
Learn with examples how to use the Laravel make controller command using the artisan command that is easy to understand and implement in your project.
In this post, I will show to you an example of how Laravel make controller command. I will give you an example that will easier to you to follow and understand. The best in Laravel is because we can just hit a command to generate a controller for your Laravel application.
After you follow this tutorial it will be easier for you to use the Laravel make controller command using artisan. Laravel artisan can run in any operating system like Ubuntu terminal and CMD in Windows.
What is a Controller in Laravel Application?
The controller will handle all requests from the user end then process the business logic and communicate with the Model then display the result to the View.
Laravel Make Controller
In the Laravel application we just simply run a command to make a controller in Laravel 9. See the following example below:
php artisan make:controller EmployeesController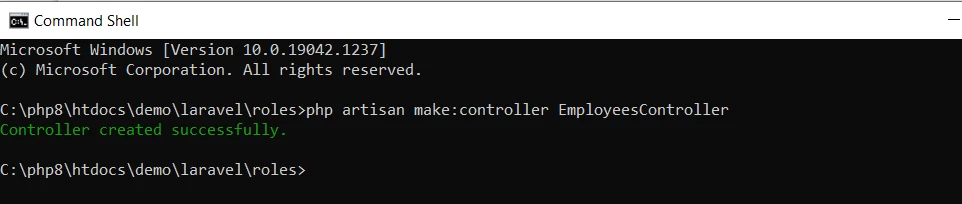
Now you will see the generated controller in your Controllers directory:
app/Http/Controllers/EmployeesController.php
<?php

namespace App\Http\Controllers;

use Illuminate\Http\Request;

class EmployeesController extends Controller
{
    //
}
Make a Laravel Controller Route
Because we have our controller created already we will next create our route and connect it to our controller.
routes/web.php
Route::get('/employees', 'EmployeesController@index')->name('employees.index');Setup Controller Index Method
Now let's create our index() method for our created controller.
<?php

namespace App\Http\Controllers;

use Illuminate\Http\Request;

class EmployeesController extends Controller
{
    public function index()
    {
        return view('employees.index');
    }
}
Setup View for our Controller
Next, we will create our view for our controller. First, create employees folder then create index.blade.php.
resources/views/employees/index.blade.php
<!DOCTYPE html>
<html>
<head>
	<meta charset="utf-8">
	<title>Emplooyes Lists</title>
</head>
<body>
	<h1>Employees</h1>
</body>
</html>
Now you have the basic idea of how to create a controller, routes, and view. I hope it helps. Thank you for reading. Don't forget to share it with your friends :)


Leave a Comment