Integrate Sweetalert 2 In PHP & MySQL Using Ajax
In this tutorial, I will show you how to integrate sweetalert 2 in PHP & MySQL using Ajax. Sweetalert 2 allows us to customize the alert box in our web applications.
In this tutorial, I will show you how to integrate sweetalert 2 in PHP & MySQL using Ajax. Sweet alert 2 allows us to customize the alert box in our web applications and the look and feel are amazing that many developers loving it. So in this article, I will share how to integrate it easily into our applications.
Creating Index HTML
So, let start first by creating our index.html file. See the code below.
<!doctype html>
<html lang="en">
<head>
<title>Integrate Sweetalert 2 In PHP & MySQL Using Ajax</title>
<!-- Bootstrap CSS -->
<link rel="stylesheet" href="https://maxcdn.bootstrapcdn.com/bootstrap/4.5.2/css/bootstrap.min.css">
<!-- Sweetalert 2 CSS -->
<link rel="stylesheet" href="assets/plugins/sweetalert2/sweetalert2.min.css">
<!-- Page CSS -->
<link rel="stylesheet" href="assets/css/styles.css">
</head>
<body>
<div class="container">
<br><br>
<h1>Integrate Sweetalert 2 In PHP & MySQL Using Ajax</h1>
<br><br>
<div class="row">
<div class="col-md-4">
<h3>Add New Employee</h3>
<form action="save.php" id="form">
<div class="form-group">
<label for="email">Email</label>
<input class="form-control" type="text" name="email">
</div>
<div class="form-group">
<label for="first_name">First Name</label>
<input class="form-control" type="text" name="first_name">
</div>
<div class="form-group">
<label for="last_name">Last Name</label>
<input class="form-control" type="text" name="last_name">
</div>
<div class="form-group">
<label for="address">Address</label>
<textarea class="form-control" type="text" name="address" rows="3"></textarea>
</div>
<button type="button" class="btn btn-primary" id="btnSubmit">Submit</button>
</form>
</div>
<div class="col-md-8">
<h3>List of Employees</h3>
<div id="employees-list"></div>
</div>
</div>
</div>
<!-- The Modal -->
<div class="modal" id="edit-employee-modal">
<div class="modal-dialog">
<div class="modal-content">
<!-- Modal Header -->
<div class="modal-header">
<h4 class="modal-title">Edit Employee</h4>
<button type="button" class="close" data-dismiss="modal">×</button>
</div>
<!-- Modal body -->
<div class="modal-body">
<form action="update.php" id="edit-form">
<input class="form-control" type="hidden" name="id">
<div class="form-group">
<label for="email">Email</label>
<input class="form-control" type="text" name="email">
</div>
<div class="form-group">
<label for="first_name">First Name</label>
<input class="form-control" type="text" name="first_name">
</div>
<div class="form-group">
<label for="last_name">Last Name</label>
<input class="form-control" type="text" name="last_name">
</div>
<div class="form-group">
<label for="address">Address</label>
<textarea class="form-control" type="text" name="address" rows="3"></textarea>
</div>
<button type="button" class="btn btn-primary" id="btnUpdateSubmit">Update</button>
<button type="button" class="btn btn-danger float-right" data-dismiss="modal">Close</button>
</form>
</div>
</div>
</div>
</div>
<!-- Must put our javascript files here to fast the page loading -->
<!-- jQuery library -->
<script src="https://ajax.googleapis.com/ajax/libs/jquery/3.5.1/jquery.min.js"></script>
<!-- Popper JS -->
<script src="https://cdnjs.cloudflare.com/ajax/libs/popper.js/1.16.0/umd/popper.min.js"></script>
<!-- Bootstrap JS -->
<script src="https://maxcdn.bootstrapcdn.com/bootstrap/4.5.2/js/bootstrap.min.js"></script>
<!-- Sweetalert2 JS -->
<script src="assets/plugins/sweetalert2/sweetalert2.min.js"></script>
<!-- Page Script -->
<script src="assets/js/scripts.js"></script>
</body>
</html>As you can see above we imported sweetalert2 javascript and styles.
Implement Sweetalert with Saving Record using Ajax?
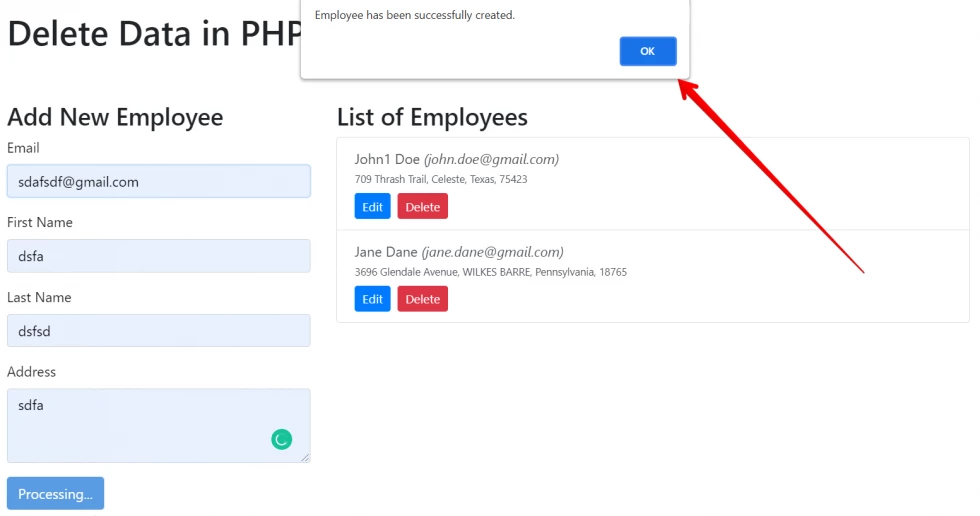
So in our previous tutorials, we are just using the native javascript alert after successfully created the record. As you can see below screenshot.
So we will replace it now using the awesome design of sweetalert2. Please check the below code on who to do it.
function save()
{
	$("#btnSubmit").on("click", function() {
		var $this 		    = $(this); //submit button selector using ID
        var $caption        = $this.html();// We store the html content of the submit button
        var form 			= "#form"; //defined the #form ID
        var formData        = $(form).serializeArray(); //serialize the form into array
        var route 			= $(form).attr('action'); //get the route using attribute action

        // Ajax config
    	$.ajax({
	        type: "POST", //we are using POST method to submit the data to the server side
	        url: route, // get the route value
	        data: formData, // our serialized array data for server side
	        beforeSend: function () {//We add this before send to disable the button once we submit it so that we prevent the multiple click
	            $this.attr('disabled', true).html("Processing...");
	        },
	        success: function (response) {//once the request successfully process to the server side it will return result here
	            $this.attr('disabled', false).html($caption);

	            // Reload lists of employees
	            all();

	            // We will display the result using alert
	            Swal.fire({
				  icon: 'success',
				  title: 'Success.',
				  text: response
				});

	            // Reset form
	            resetForm(form);
	        },
	        error: function (XMLHttpRequest, textStatus, errorThrown) {
	        	// You can put something here if there is an error from submitted request
	        }
	    });
	});
}
In our save function above you will see a code that started with Swal.fire inside the ajax success. As you can see below.
Swal.fire({
icon: 'success',
title: 'Success.',
text: response
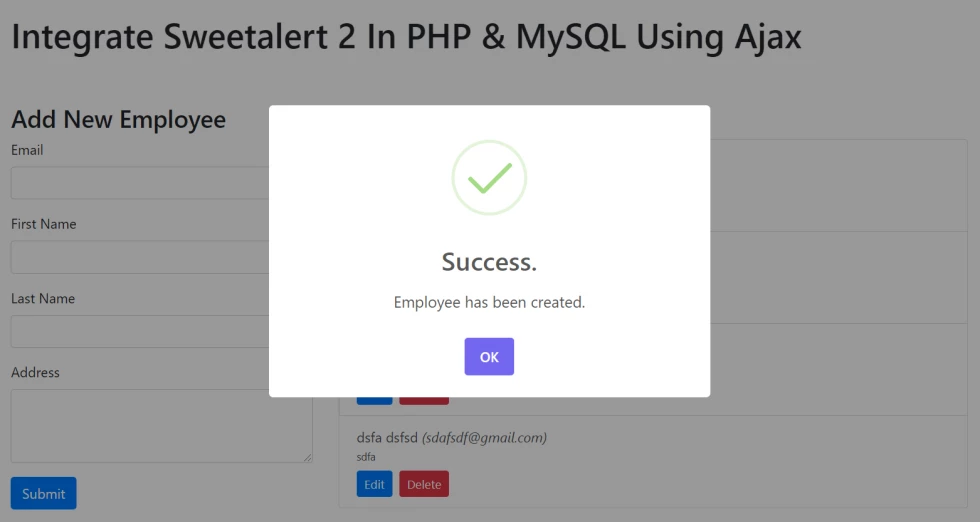
});Now since we already added our sweetalert2 so if we saving a new record the alert box will appear like this shown below.
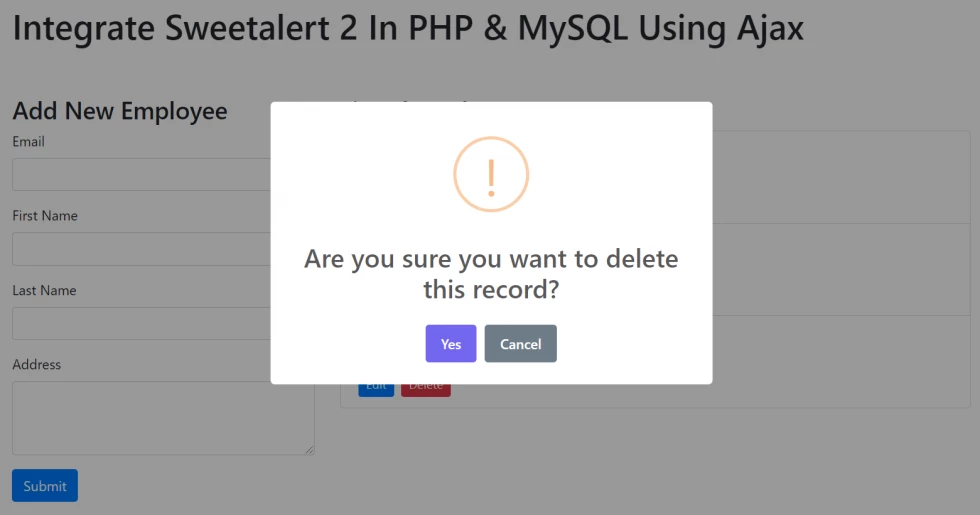
Since we already implement the basic one. Next, we will implement the Confirm dialog type sweetalert 2.
Implement Dialog Type Sweetalert with Ajax Delete on PHP & MySQL
Below is an example code about the dialog type sweetalert 2 that we are going to use for confirming the record deletion.

Swal.fire({
	icon: 'warning',
  	title: 'Are you sure you want to delete this record?',
  	showDenyButton: false,
  	showCancelButton: true,
  	confirmButtonText: 'Yes'
}).then((result) => {
  /* Read more about isConfirmed, isDenied below */
  if (result.isConfirmed) {
  	//action here
  }

});
Since you have the sample code about we will next tackle the full code on how to implement it with ajax delete. Kindly check the below code.
function del()
{
	$(document).delegate(".btn-delete-employee", "click", function() {


		Swal.fire({
			icon: 'warning',
		  	title: 'Are you sure you want to delete this record?',
		  	showDenyButton: false,
		  	showCancelButton: true,
		  	confirmButtonText: 'Yes'
		}).then((result) => {
		  /* Read more about isConfirmed, isDenied below */
		  if (result.isConfirmed) {

		  	var employeeId = $(this).attr('data-id');

		  	// Ajax config
			$.ajax({
		        type: "GET", //we are using GET method to get data from server side
		        url: 'delete.php', // get the route value
		        data: {employee_id:employeeId}, //set data
		        beforeSend: function () {//We add this before send to disable the button once we submit it so that we prevent the multiple click

		        },
		        success: function (response) {//once the request successfully process to the server side it will return result here
		            // Reload lists of employees
	            	all();

		            Swal.fire('Success.', response, 'success')
		        }
		    });


		  } else if (result.isDenied) {
		    Swal.fire('Changes are not saved', '', 'info')
		  }
		});


	});
}
Okay, you are ready now implementing sweet alert 2 with your project. So it's time to take a look at the actual actions of this code. Just click the download button below to get the complete source code of this tutorial.
Thank you for reading and happy coding :)


Leave a Comment