Return JSON Response in PHP & MySQL using Ajax and jQuery
I will share with you how to return JSON response in PHP & MySQL using Ajax & jQuery this is useful to display multiple types of data from the server response.
In this tutorial, I will share with you how to return JSON response in PHP & MySQL using Ajax & jQuery this is useful to display multiple types of data from server response and process it to our client-side using ajax and jquery. Don't worry this method is easy we are going to use an array from the server and encode it with JSON format.
Basic Example
Let's do the basics first we will create a new file called basic.php as you can see below code I created an associative array with first_name & last_name name keys. Then I use json_encode to encode the array into JSON format.
<?php
$result = [];
$result['first_name'] = "John";
$result['last_name'] = "Doe";
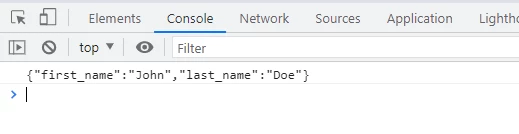
echo json_encode($result);
?>Then this is the result when executing it in the browser.
![]()
AJAX Integration
For ajax integration we need to create a simple button in our index.html then a simple ajax function to communicate the above code basic.php.
Let's code our button with HTML.
<button type="button" class="btn btn-primary" id="btnBasicResponse">Basic JSON Response</button>Then next is our javascript ajax code. We will create our function named basic() inside scripts.js. Here is the code below:
function basic()
{
	$(document).delegate("#btnBasicResponse", "click", function() {

		// Ajax config
		$.ajax({
	        type: "GET", //we are using GET method to get data from server side
	        url: 'basic.php', // get the route value
	        success: function (response) {//once the request successfully process to the server side it will return result here
	            console.log(response)
	        }
	    });

	});
}
Then if we will click the button "Basic JSON Response" the result will be like this on the console.
 Next, we will parse the response JSON so that we can easily call it as JSON. See the code below.
function basic()
{
	$(document).delegate("#btnBasicResponse", "click", function() {

		// Ajax config
		$.ajax({
	        type: "GET", //we are using GET method to get data from server side
	        url: 'basic.php', // get the route value
	        success: function (response) {//once the request successfully process to the server side it will return result here
	            //parse json
	            response = JSON.parse(response);

	            console.log(response)
	        }
	    });

	});
}
As you can see we add a new line of code "response = JSON.parse(response);". Kindly see the console result after this code.
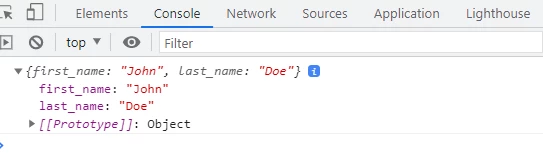 As you can see from the result above it is clickable now because we already parse it as JSON from a string.
Display by JSON Property
Now we will display the JSON by property like if you want to display the first_name value only. Here is the code update below:
function basic()
{
	$(document).delegate("#btnBasicResponse", "click", function() {

		// Ajax config
		$.ajax({
	        type: "GET", //we are using GET method to get data from server side
	        url: 'basic.php', // get the route value
	        success: function (response) {//once the request successfully process to the server side it will return result here
	            //parse json
	            response = JSON.parse(response);

	            console.log(response);
	            console.log("First Name:" + response.first_name);
	        }
	    });

	});
}
As you can see below we add a new line of code "console.log("First Name:" + response.first_name);" now in this code, we only access the first_name value.
Display JSON Property in HTML
Now we will display the specific property on your web page. We will update our HTML code below.
<button type="button" class="btn btn-primary" id="btnBasicResponse">Basic JSON Response</button>
<br>
<p><span id="json_first_name"></span></p>
Then also our javascript code inside scripts.js. See below code updates.
function basic()
{
	$(document).delegate("#btnBasicResponse", "click", function() {

		// Ajax config
		$.ajax({
	        type: "GET", //we are using GET method to get data from server side
	        url: 'basic.php', // get the route value
	        success: function (response) {//once the request successfully process to the server side it will return result here
	            //parse json
	            response = JSON.parse(response);

	            $("#json_first_name").html("First Name: " + response.first_name);
	        }
	    });

	});
}
As you can see above I add new line of code "$("#json_first_name").html("First Name: " + response.first_name);". I call the ID selector "#json_first_name" and use html() function to display the first_name value from your server.
See below result:

Now since you have the basic knowledge already of how to Response the JSON we will implement the dynamic data using PHP & MySQL with Ajax.
Display Dynamic Data Using Response JSON with PHP & MySQL
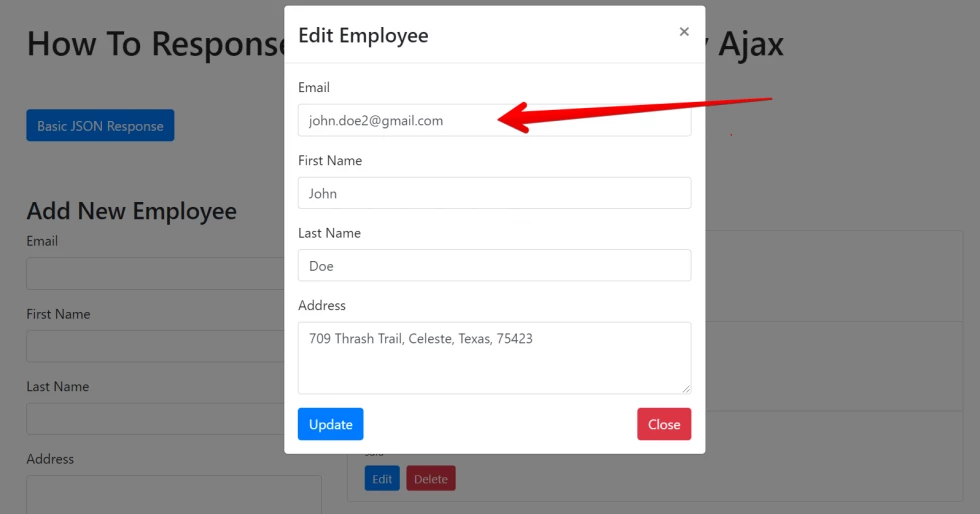
I will share with you the easy method to display the dynamic data from your server-side. In this example, we will display the employee in Edit Employee Modal using ajax and jquery.
Here is the HTML code inside index.html
<div class="col-md-8">
	<h3>List of Employees</h3>
	<div id="employees-list"></div>
</div>
Our HTML code for modal inside index.html
<!-- The Modal -->
<div class="modal" id="edit-employee-modal">
<div class="modal-dialog">
<div class="modal-content">
<!-- Modal Header -->
<div class="modal-header">
<h4 class="modal-title">Edit Employee</h4>
<button type="button" class="close" data-dismiss="modal">×</button>
</div>
<!-- Modal body -->
<div class="modal-body">
<form action="update.php" id="edit-form">
<input class="form-control" type="hidden" name="id">
<div class="form-group">
<label for="email">Email</label>
<input class="form-control" type="text" name="email">
</div>
<div class="form-group">
<label for="first_name">First Name</label>
<input class="form-control" type="text" name="first_name">
</div>
<div class="form-group">
<label for="last_name">Last Name</label>
<input class="form-control" type="text" name="last_name">
</div>
<div class="form-group">
<label for="address">Address</label>
<textarea class="form-control" type="text" name="address" rows="3"></textarea>
</div>
<button type="button" class="btn btn-primary" id="btnUpdateSubmit">Update</button>
<button type="button" class="btn btn-danger float-right" data-dismiss="modal">Close</button>
</form>
</div>
</div>
</div>
</div>Then our PHP code inside get.php as you can see below that I encode the $row variable array from the result query.
<?php
	// include config file
	require_once 'config.php';

	//a PHP Super Global variable which used to collect data after submitting it from the form
	$request = $_REQUEST;
	//define the employee ID
	$employeeId = $request['employee_id'];

	// Set the INSERT SQL data
	$sql = "SELECT * FROM employees WHERE id='".$employeeId."'";

	// Process the query
	$results = $db->query($sql);

	// Fetch Associative array
	$row = $results->fetch_assoc();

	// Free result set
	$results->free_result();

	// Close the connection after using it
	$db->close();

	// Encode array into json format
	echo json_encode($row);
?>
Then now we will add our javascript code get() function inside scripts.js.
function get()
{
	$(document).delegate("[data-target='#edit-employee-modal']", "click", function() {

		var employeeId = $(this).attr('data-id');

		// Ajax config
		$.ajax({
	        type: "GET", //we are using GET method to get data from server side
	        url: 'get.php', // get the route value
	        data: {employee_id:employeeId}, //set data
	        beforeSend: function () {//We add this before send to disable the button once we submit it so that we prevent the multiple click

	        },
	        success: function (response) {//once the request successfully process to the server side it will return result here
	            response = JSON.parse(response);
	            $("#edit-form [name="id"]").val(response.id);
	            $("#edit-form [name="email"]").val(response.email);
	            $("#edit-form [name="first_name"]").val(response.first_name);
	            $("#edit-form [name="last_name"]").val(response.last_name);
	            $("#edit-form [name="address"]").val(response.address);
	        }
	    });
	});
}
Loop the JSON Response
Since you already know how to display your JSON response to your web page. Now I will give you an example of how to loop the JSON. Below are the screenshot example on listing the employees via ajax with JSON response.
Before we dive in I will show you first a basic code on how to do it. As you can see in the code below I use "$.each(response, function(key,value) {" to loop the parsed JSON.
function all()
{
	// Ajax config
	$.ajax({
        type: "GET", //we are using GET method to get all record from the server
        url: 'all.php', // get the route value
        success: function (response) {//once the request successfully process to the server side it will return result here

            // Parse the json result
        	response = JSON.parse(response);

        	if(response.length) {
        		$.each(response, function(key,value) {
        			console.log(value.first_name + " " + value.last_name);
        		});
        	}
        }
    });
}
Kindly check the console result below of the above code.
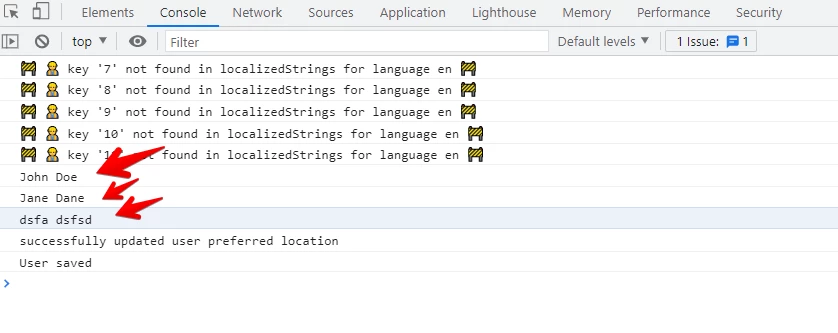 So that's the basic way on how to loop the JSON. So we will apply it in the advance by displaying the list of employees using the bootstrap list group as you can see the result below:

Now let do the code. First set up our HTML code inside index.html.
<div class="col-md-8">
	<h3>List of Employees</h3>
	<div id="employees-list"></div>
</div>
Then next our PHP Code inside all.php.
<?php
	// include config file
	require_once 'config.php';

	// SQL Statement
	$sql = "SELECT * FROM employees";

	// Process the query
	$results = $db->query($sql);

	// Fetch Associative array
	$row = $results->fetch_all(MYSQLI_ASSOC);

	// Free result set
	$results->free_result();

	// Close the connection after using it
	$db->close();

	// Encode array into json format
	echo json_encode($row);
?>
Then now let's code the javascript for looping the employee's result via ajax. You will find this code inside scripts.js with all() functions.
function all()
{
	// Ajax config
	$.ajax({
        type: "GET", //we are using GET method to get all record from the server
        url: 'all.php', // get the route value
        success: function (response) {//once the request successfully process to the server side it will return result here

            // Parse the json result
        	response = JSON.parse(response);

            var html = "";
            // Check if there is available records
            if(response.length) {
            	html += '<div class="list-group">';
	            // Loop the parsed JSON
	            $.each(response, function(key,value) {
	            	// Our employee list template
					html += '<a href="#" class="list-group-item list-group-item-action">';
					html += "<p>" + value.first_name +' '+ value.last_name + " <span class='list-email'>(" + value.email + ")</span>" + "</p>";
					html += "<p class='list-address'>" + value.address + "</p>";
					html += "<button class='btn btn-sm btn-primary mt-2' data-toggle='modal' data-target='#edit-employee-modal' data-id='"+value.id+"'>Edit</button>";
					html += "<button class='btn btn-sm btn-danger mt-2 ml-2 btn-delete-employee' data-id='"+value.id+"' typle='button'>Delete</button>";
					html += '</a>';
	            });
	            html += '</div>';
            } else {
            	html += '<div class="alert alert-warning">';
				  html += 'No records found!';
				html += '</div>';
            }

            // Insert the HTML Template and display all employee records
			$("#employees-list").html(html);
        }
    });
}
Now you have the foundation already about JSON Response from your server-side. I hope this article may help you. To see the action capability of this code just click the "Download" button below.
Thank you for reading. Happy Coding!


Leave a Comment